Showing posts with label Crafts. Show all posts

Tuesday, September 18, 2012

Pinterest Projects

I, like many other moms and bloggers, love Pinterest.  There I said it.  Ever since Jon made me I chose to get an iPhone, I have been on Pinterest much more often.  But, I have not created many of the items on my boards.  So I am challenging myself to choose something from Pinterest every two weeks and actually try it.  (I had thought to try every week but with three children, I knew that two weeks would be challenge enough.)  There are lots of recipes and crafts to choose from and I look forward to being able to complete them.

This week I am starting with  DIY onesies for baby gifts for two sweet friends of mine.  I love this onesie because it reminds me of the book The Very Hungry Caterpillar by Eric Carle.  The completed onesies turned out cute and were simple to make. 

In fact I may have to make one for Ladybug!  And as a bonus, I have lots of leftover buttons for patterning activities with Buddy and Sweetpea.  Yay for Pinterest!

Thursday, September 13, 2012

Noodle Art

As we were working through our units of My Father's World Kindergarten, one of the extra activities suggested was noodle art. 

This was one of the easiest activities and both Sweetpea and Buddy loved it!  All you need is boiled noodles and construction paper.  I recommend to not over-boil the noodles because they break really easily if they become too soft.  The construction paper does crinkle as the noodles dry but I think that is okay.

Here is Buddy's art work.  He did it all by himself even though he had a hard time making the curve for the S.  I was glad he persisted and he was proud at the end.

Sweetpea needed help with the S but loved making the sun by breaking noodles into pieces. 

I think this will be a great rainy day activity to use again in the future.  I look forward to seeing what Buddy and Sweetpea can create with spaghetti noodles.

Friday, March 30, 2012

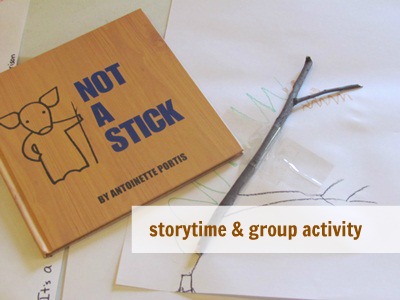
Not a Stick

Not a Stick -- Story and Creative Activity was a very interesting blog post about incorporating books and imaginative activities.
I hope to find the book, "Not a Stick" by Antoinette Portis at our library soon.  Buddy is fascinated with sticks, like most boys, and this would be a great way to encourage his imagination.  I don't know how many times I've made him leave sticks outside and I know Buddy would love to have permission to bring one inside!

Saturday, February 11, 2012

Valentine's Day Ideas

This year we are having a simpler Valentine's Day around our house.  Baby 3 will be arriving two days later and I don't have as much energy to do a lot of crafts right now.  I still want to celebrate with Buddy and Sweetpea so here are a few cute ideas that I combined to do with them today.
Heart Stamps:


Hand Print Hearts:
Handprint heart

Buddy and Sweetpea loved painting today and the end results were super cute.  Sorry for no pictures but I was trying hard to keep the paint as contained as possible.

If you are looking for more ideas, here are the links to what we did last year.
Happy Crafting!

Thursday, February 9, 2012

Simple Bow Holder

Looking for a simple easy way to find all those bows for your daughter's hair?  The way we were keeping the bows put away was not working and I could not easily and quickly find a bow for Sweetpea's hair.  After a morning of frustration, I remembered the way my aunt used to keep my cousin's bows so I quickly implemented her strategy. 
All I did was hang two pieces of ribbon to the wall and then clip all of Sweetpea's bows to the ribbon.
Easy.
Simple.
Organized.

Tuesday, February 7, 2012

Jewelry Board

This amazing jewelry board was my big gift from Jon this past Christmas.  He made it himself and I love it! 
I used to store my necklaces in a pile on my dresser and rarely wore them because who has time to sort through to find just the right one?  So Jon solved this problem and reminded me that even moms can look stylish.  I love when my sweet hubby sees a solution to a problem before I even recognized that there was a problem.
If you are interested in making one for yourself, you will need a large cork board, smaller cork squares, fabric, ribbon, and pushpins. 
Jon covered the large cork board with fabric and outlined it with the brown ribbon.  Then he covered the smaller squares with the contrasting fabric and glued them on to the large board.  After pushing the pins into the cork board, I hung up my new necklaces and bracelets!  Now I'm can easily select a necklace and bracelet if desired and don't have to worry about them becoming tangled.    

Wednesday, December 7, 2011

Christmas Crafts

The Amazing Mess has great ideas for Christmas crafts to do with young children.  This is the beginning to her series 12 Days of Christmas Carols and Crafts from last year.  I saved several of the ideas to use this year with Buddy and Sweetpea. 

2 Teaching Mommies posted a Christmas Tree preschool pack.  There are really fun learning activities with a Christmas focus.

Little Blots of Faith has a sensory Baby in the Manger craft.  I hope to be able to make this with Sweetpea since she'll have to handle things like sandpaper as we work. 

I hope you have fun making Christmas crafts with your children!   I know Buddy and Sweetpea are going to have fun as well.

Thursday, December 1, 2011

Advent Calendars

I've been wanting an advent calendar for our family but have not been able to find exactly what I was looking for in stores.  So I finally made our own out of felt.  Overall, I was ultimately pleased with the way it turned out.  It isn't perfect but it is ours and I'm looking forward to putting it to use.  Inside each pocket is the daily reading from I Can Teach My Child and scattered throughout on selected days, I've added special things to do like "Bake Christmas Cookies" and "Drink Hot Chocolate". 
I hope this helps keep our focus on the true meaning of Christmas!


We also made the advent chain from Spell Out Loud.  Buddy and Sweetpea had a blast helping me glue the chain together.  This is a little simpler for Sweetpea to take apart and is more of a visual countdown for both of them.    The Scripture verses are a little longer but that is okay since we are working on.
getting Sweetpea to sit still through longer readings.

If you are looking for another advent chain Spell Out Loud also has a Names of Jesus chain that I hope to use one year in the future. 

No matter what your family does this month, I hope that as we enter into December, that our focus remains on Jesus as the reason that we celebrate!  Merry Christmas!

Friday, November 18, 2011

Thanksgiving Shirts

Again, while surfing Pinterest, I saw the cutest idea for a turkey shirt but the link didn't work.  So I used the picture and created my own version.  Although I'm a beginner at sewing, I thought this would be fairly easy.  I was right and it turned out to be a lot of fun until Buddy announced that he didn't want to be a turkey, he wanted a lion.  Maybe next project!  : ) 
Here's how I made our turkey shirts. 

I started by making a pattern on Word using the shapes tool.  Sweetpea's pattern is smaller than Buddy's since her shirt is smaller and I didn't want the turkey to overwhelm her. 

Brown fabric and at least two colored fabric pieces are needed for the turkey.  Using the pattern, I traced out all pieces and cut them out.

After arranging the turkey the way I wanted on their shirts, I used an iron-on adhesive to keep the pieces in place.  I mainly did this since I am new at sewing and don't trust my pinning skills yet.  I sewed around the body and all the pieces and then added a face as well.  Attaching the wiggly eyes turned out to be the conundrum.  All the glue I had at home would not hold up to washing in the washing machine until I found Liquid Stitch.  Now the eyes are attached and the shirts are ready to go!


Overall, I am very happy with the way they turned out.  Neither turkey is perfect but I know the kiddos will look cute!

Thursday, November 17, 2011

Thanksgiving Bow

Thanks to Pinterest, I found this adorable turkey bow for Sweetpea and decided it couldn't be that hard to make.  After reading the tutorial, I gathered my material and got to work.  In the end, instead of sewing it all closed, I just used craft glue.  Sweetpea's bow is pretty small and it would have been hard for me, a beginner at sewing, to make it look right.  I love the googly eyes too!  The greatest thing about this bow is that it took about 20 minutes to complete...and then time for the glue to dry.


I can't wait for her to wear it to our church Thanksgiving dinner and on Thanksgiving Day. 

Tuesday, November 15, 2011

Handprint Turkeys

Yesterday, Buddy, Sweetpea, and I made our version of the Handprint Turkeys at Meet the Dubiens.  I've used paint to make their handprints before but it always makes me very nervous.  Instead we decided to trace hands on construction paper to make the turkey feathers.  A lesson learned for me was to not just make up crafts on the spot and to take time to do a little prep work.  Buddy and Sweetpea were not very patient as I cut out their hands though they did draw a bit on their background paper.  Then even after we had glued down the feathers and body, they had to wait again while I cut out the shapes for the face.  Older children would be better able to cut out their own shapes but Buddy is not quite there yet with his scissor skills.

Here are our finished turkeys.  This is Sweetpea's and obviously I helped her place the face pieces and draw legs.  She had fun holding onto the colored pencils and pushing down the shapes.

Buddy was able to add his turkey's face by himself.  He didn't like the idea of a waddle so he drew a mouth.  Then he added eyelashes to the turkey as well.  I love how his turned out!

These cute turkeys are now hanging on our dining room wall and I'm getting more and more excited for Thanksgiving day.

Monday, November 14, 2011

Thanksgiving Projects

Today I was thinking about various Thanksgiving crafts and I wanted to post some of the ideas I've found either through Pinterest (anyone else as addicted as I am?) or through searching blogs.
I hope to make these Pilgrim hat cookies soon because I love all the things they are made from!   They would make an adorable treat to take to a school Thanksgiving party or just for an office surprise.

This turkey craft is a great way to get children to think about things they are thankful and write onto the feathers.  Depending on the age of the children, more parental guidance may be needed.  Buddy has been thankful for his Buzz Lightyear toy so this craft is a great way to capture the age of your child!

I love handprint activities for my children and this handprint turkey would look cute on the wall year after year.

2 Teaching Mommies has a Turkey unit with lots of fun activities.  They also have a Thanksgiving unit too that would be great as well. 

Happy Thanksgiving crafting!

Tuesday, September 27, 2011

Lined Canvas Bins

Today I finished the Lined Canvas Bins from Positively Splendid!  I was totally excited to see the completed results and was glad to see a DIY project finished.  Hard to believe this was a diaper box before.  Check out the finished results!


I'm looking forward to making a second matching box soon!

Thursday, September 8, 2011

Stickers and Fine Motor Skills

Recently, I have introduced stickers to Sweetpea's craft time and she loves them!  The added bonus for letting her peel and stick the stickers onto paper is the development of fine motor skills. 

When I first gave her the sheet of stickers, she was very excited but had no idea how to remove them and was content to just stick them to the paper.  (I have set boundaries with my children's use of stickers after finding stickers on every surface with Buddy.  Stickers can only be placed on paper or people with permission.)  After a few tries, Sweetpea was able to remove and place the stickers on her own.  Now when we start to pull out crayons and paper, she points to our sticker bin as well.  Here are a few more pictures of Sweetpea working on her fine motor skills while making beautiful art!
I love the concentration on her face in this photo!

Yes, occasionally she will taste the stickers.

Sweetpea is placing her stickers very carefully!


Tuesday, July 26, 2011

Homemade Hummingbird Food

Today we made homemade hummingbird food and I am looking forward to watching the hummingbirds come and enjoy.  It was such an easy thing to make so I thought I would share how.

Homemade Hummingbird Food
4 cups of water
1 cup of sugar
hummingbird food container

Place water into a pot.  Buddy loves measuring things and the water was no exception.

Bring the 4 cups of water to boil.  I did this part and kept Buddy and Sweetpea out of the kitchen.  Once the water is boiling, turn off the heat to keep too much water from boiling out of the pot and messing up the 4 to 1 ratio. 

Pull the pot off the heat and measure 1 cup of sugar into the water.  Stir until the sugar is dissolved.

Cool completely in the refrigerator and pour into the hummingbird feeder.

Hang up and enjoy!

Friday, June 24, 2011

Sewing Machine

Factory-Reconditioned Singer 2263.RF Simple 23-Stitch Mechanical Sewing MachineWhen we arrived home from vacation, I found a wonderful early birthday surprise waiting for me...a sewing machine!  Jon had bought me the one that I had been looking at for months and several beginning tools for sewing and quilting.  My birthday isn't until July so it was a big surprise but a very welcome one.
I am super excited to begin learning how to sew and hope to make several of the projects that I had posted about soon.  To start out, I plan to find something simple but hope to work up to the DIY projects that I posted about in April.  Happy Sewing!

Saturday, June 11, 2011

Jesus Loves Me Wall Hanging

I recently made Sweetpea a wall hanging for her room that is similar to one that my cousin, Stephanie, made for Buddy.  I think it is a very simple reminder for children that Jesus loves them and Buddy learned early on to recognize "Jesus" in print because of his wall hanging.  I also wanted Sweetpea to have a girly decoration in her room.  The wall hanging was an easy and cute decoration and would make a great baby shower gift.


Materials Needed:
Blank Square Canvas
Black Paint
Other paint colors
Paint brushes
Pencil
Shape stencils
Ribbon  (not pictured because I cannot find my ribbon after our move)


Carefully divide the canvas into thirds by using the ruler.  Trace shapes in random pattern.  Write Jesus Loves Me! across the middle.  I apologize that the picture is hard to see.
 
Paint the shapes and the top and bottom thirds with colors of your choice.  Two coats of paint will fully cover the canvas.  Paint the words black.  Attach ribbon to the top and hang on a wall.

This is the picture of Buddy's wall hanging that Stephanie made.  I love the font that "Jesus Loves Me" that she used but every time I tried to replicate it, it never worked quite right for me.  I was glad I used a pencil to trace at first. 

These wall hangings are simple but incredibly cute for a young child's wall and an easy gift to give for a shower or birthday.  I love the way it is a great reminder of the truth of Jesus' love.

Thursday, June 2, 2011

Rainbow Fish

Rainbow Fish Big Book
One of our most recent library books has been The Rainbow Fish by Marcus Pfister.  This is a great story of a fish with shiny scales who refuses to share and the lesson he learns.  One of my favorite aspects of the book is that the illustrations are beautiful.  It is a very well written story that went well with our Bible verse for the week of Ephesians 4:32, "And be kind to one another, tenderhearted, forgiving one another, even as God in Christ forgave you."  The Rainbow Fish learns to be kind as the other fish forgive him at the end of the story.

After nap time, I decided, spur of the moment, to let Buddy make a Rainbow Fish and this turned out to be a great Bible verse poster as well. 

Materials Needed:
Blue Construction Paper
Outline of fish (I very quickly pulled one off of the internet but forgot to save the link.  Google is a great tool.)
Glue
Blue, Green, and Purple Crayons
Foil (a great last minute addition not pictured below)
Glitter


Buddy and I glued the fish down onto the construction paper and I let him begin coloring.

While Buddy was coloring, Sweetpea woke up and wanted to join in on the fun.

After he colored the fish, I gave him a small piece of foil to tear into scales.

He very carefully glued the scales in very precise locations.

After the glue for the foil scales had dried for a little bit, we added some glitter lines on the fins.  (Tip:  Glitter always ends up everywhere but the mess can be somewhat contained if you place a cookie sheet underneath.  Ours happened to be a pizza pan because Buddy insisted he wanted a circle.)

I added our Bible verse on top and once it was dry, we hung it up on the refrigerator as a reminder of our memory verse.

Buddy's Rainbow Fish

Sweetpea's Rainbow Fish